Custom Objects & Lead Scoring
Contacts cover people, but many businesses track things too — pets, properties, vehicles, policies, enrollments. Custom objects let you model those record types and relate them back to your contacts. Lead scoring, meanwhile, ranks contacts by how engaged or qualified they are, so your team knows who to call first. This page covers both.
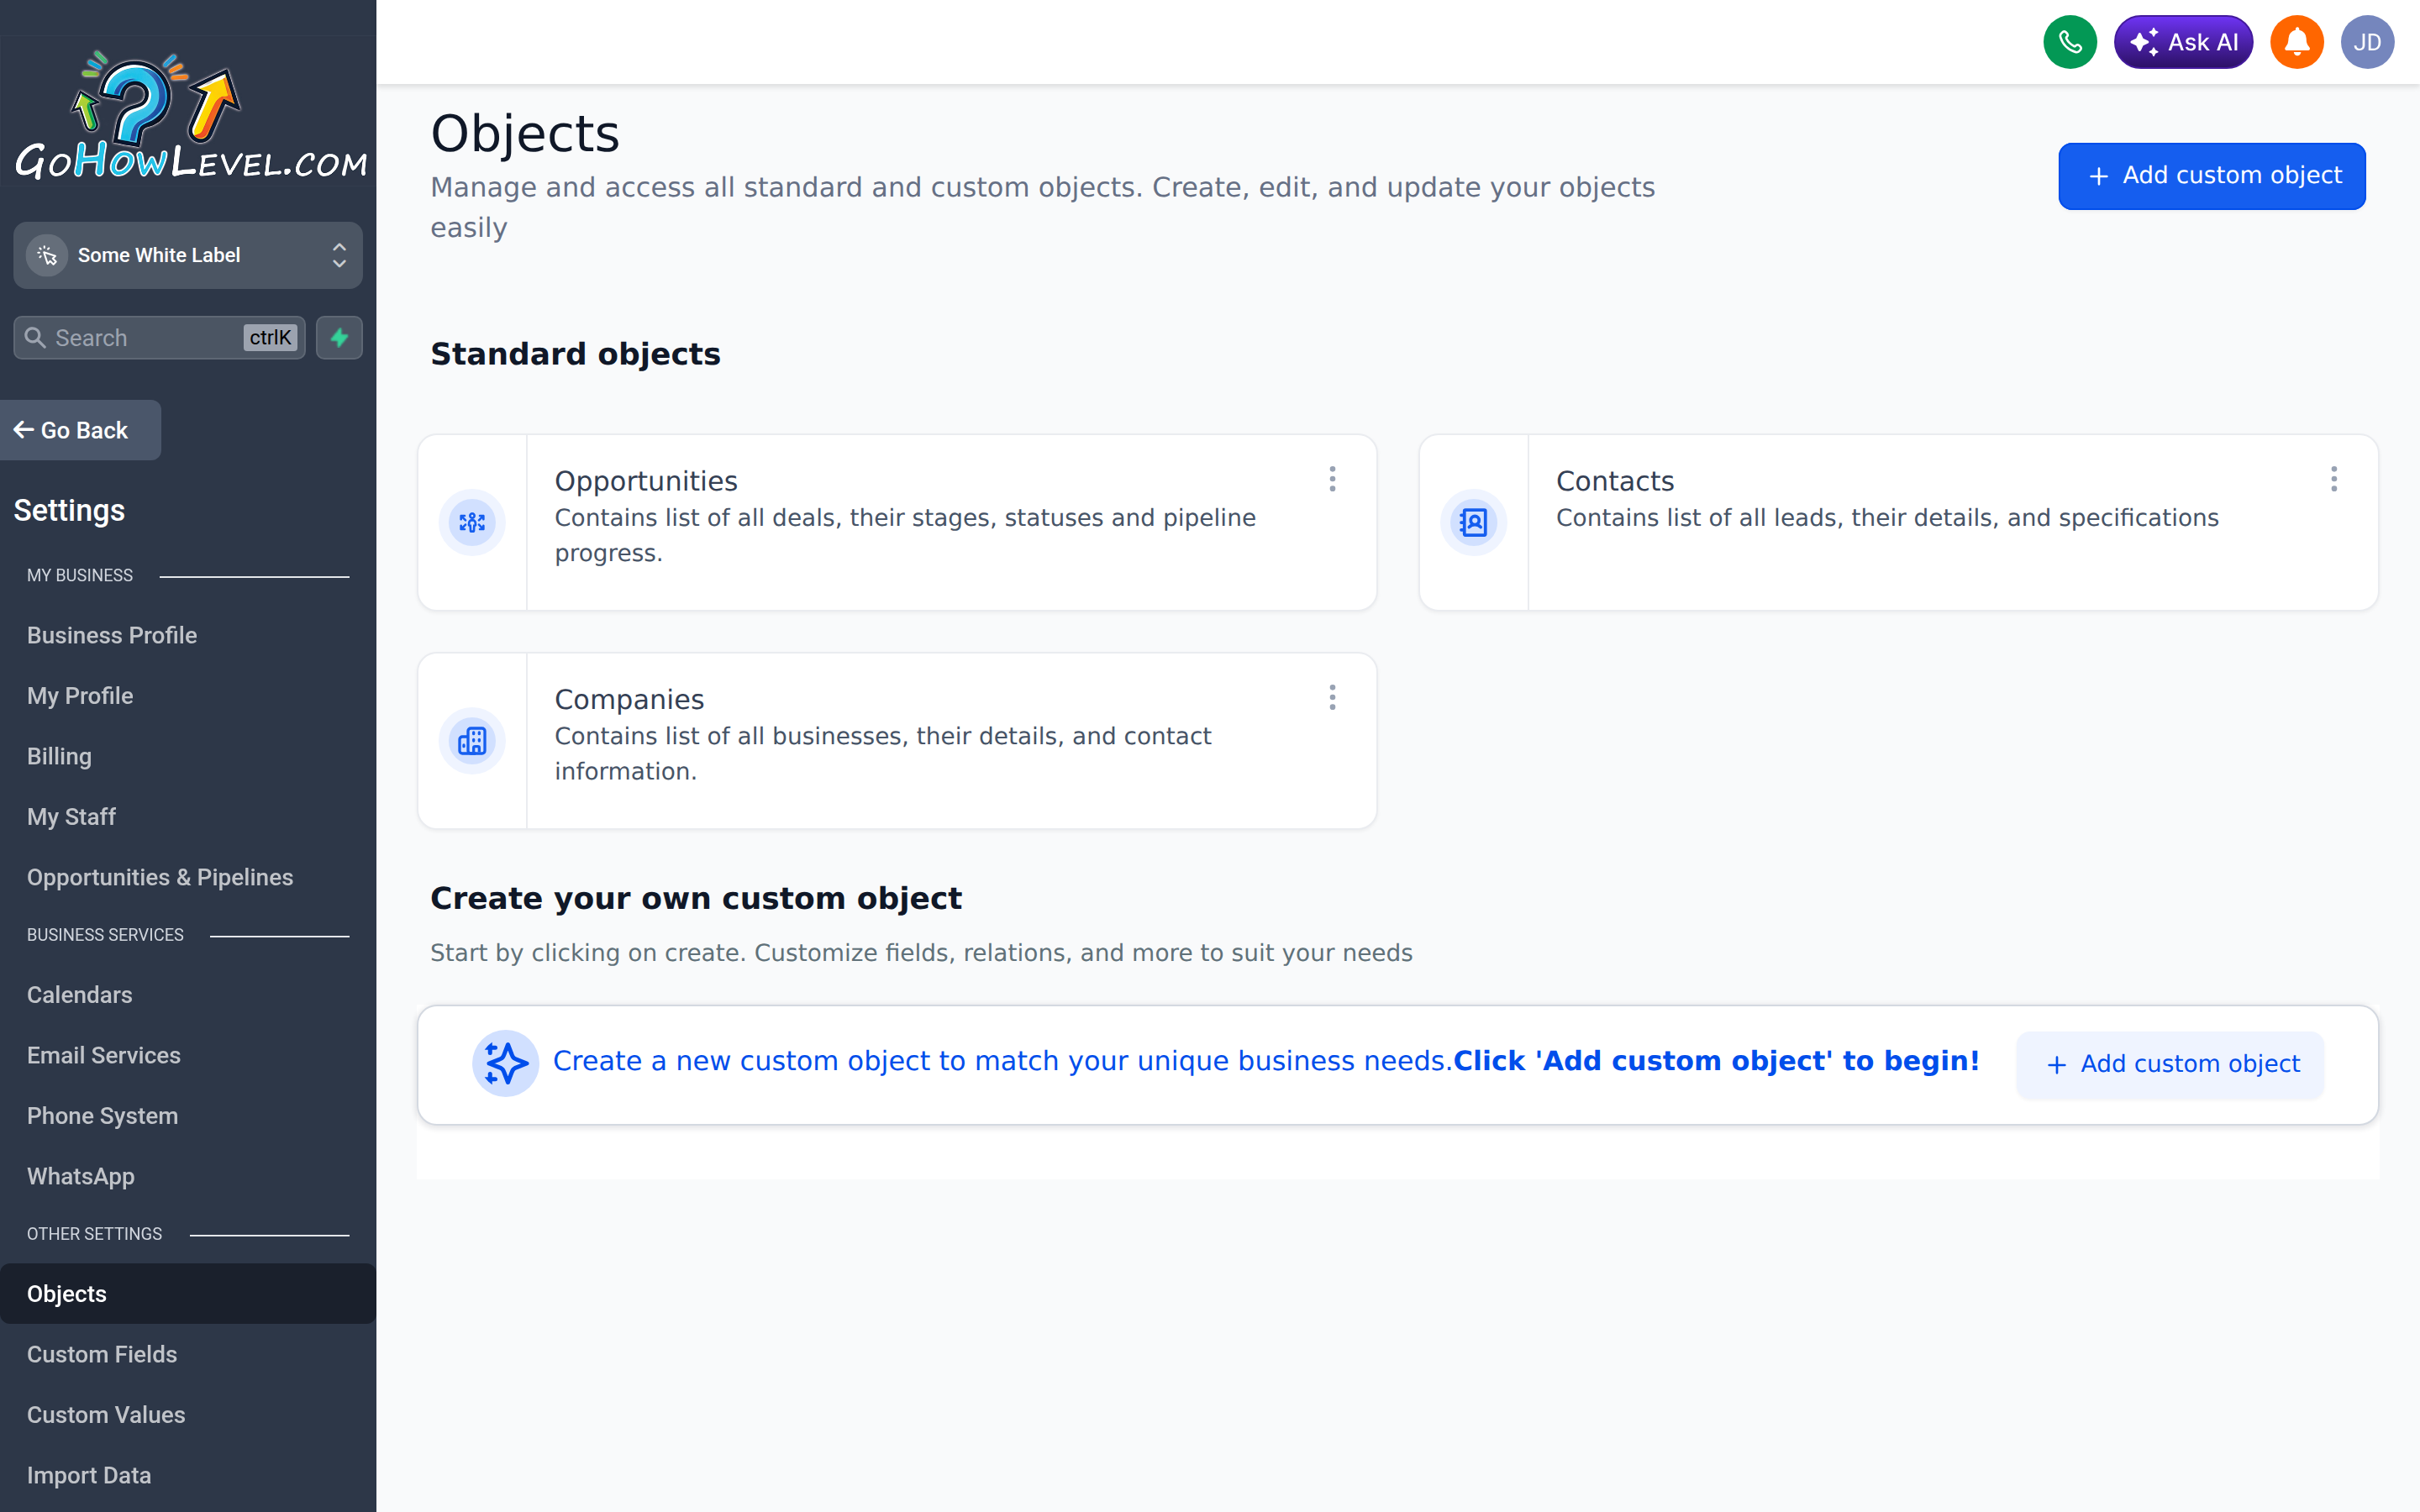
Custom Objects let you model record types beyond contacts and relate them back to people.
Custom objects
Section titled “Custom objects”A custom object is a record type you define yourself, with its own custom fields, that links to a contact. A veterinary clinic might create a Pets object; a real estate team might create Properties; an insurance agency might create Policies. Each contact can then have one or more related records of that type.
Creating a custom object
Section titled “Creating a custom object”- Open Settings → Objects (or Custom Objects).
- Click Add Object (or Create Object).
- Give the object a singular and plural name (e.g., “Pet” / “Pets”).
- Set its primary display field — the value used to label each record (e.g., the pet’s name).
- Save the object.
Adding fields to the object
Section titled “Adding fields to the object”- Open your new object’s settings.
- Add custom fields the same way you would for contacts — choosing a type (text, number, date, dropdown, and so on) for each.
- Save.
These fields define what data each record of the object holds — for example, a Pet’s breed, birthday, and vaccination date.
Relating records to contacts
Section titled “Relating records to contacts”Custom objects connect back to contacts through a relationship, so a record can be tied to the person it belongs to. Once set up, you can view and add related records directly from the contact, and from the object’s own list view.
Lead scoring
Section titled “Lead scoring”Lead scoring assigns points to a contact based on who they are and what they do, producing a single number that tells your sales team how hot a lead is. A contact who opens emails, submits a form, and books a call should rise to the top.
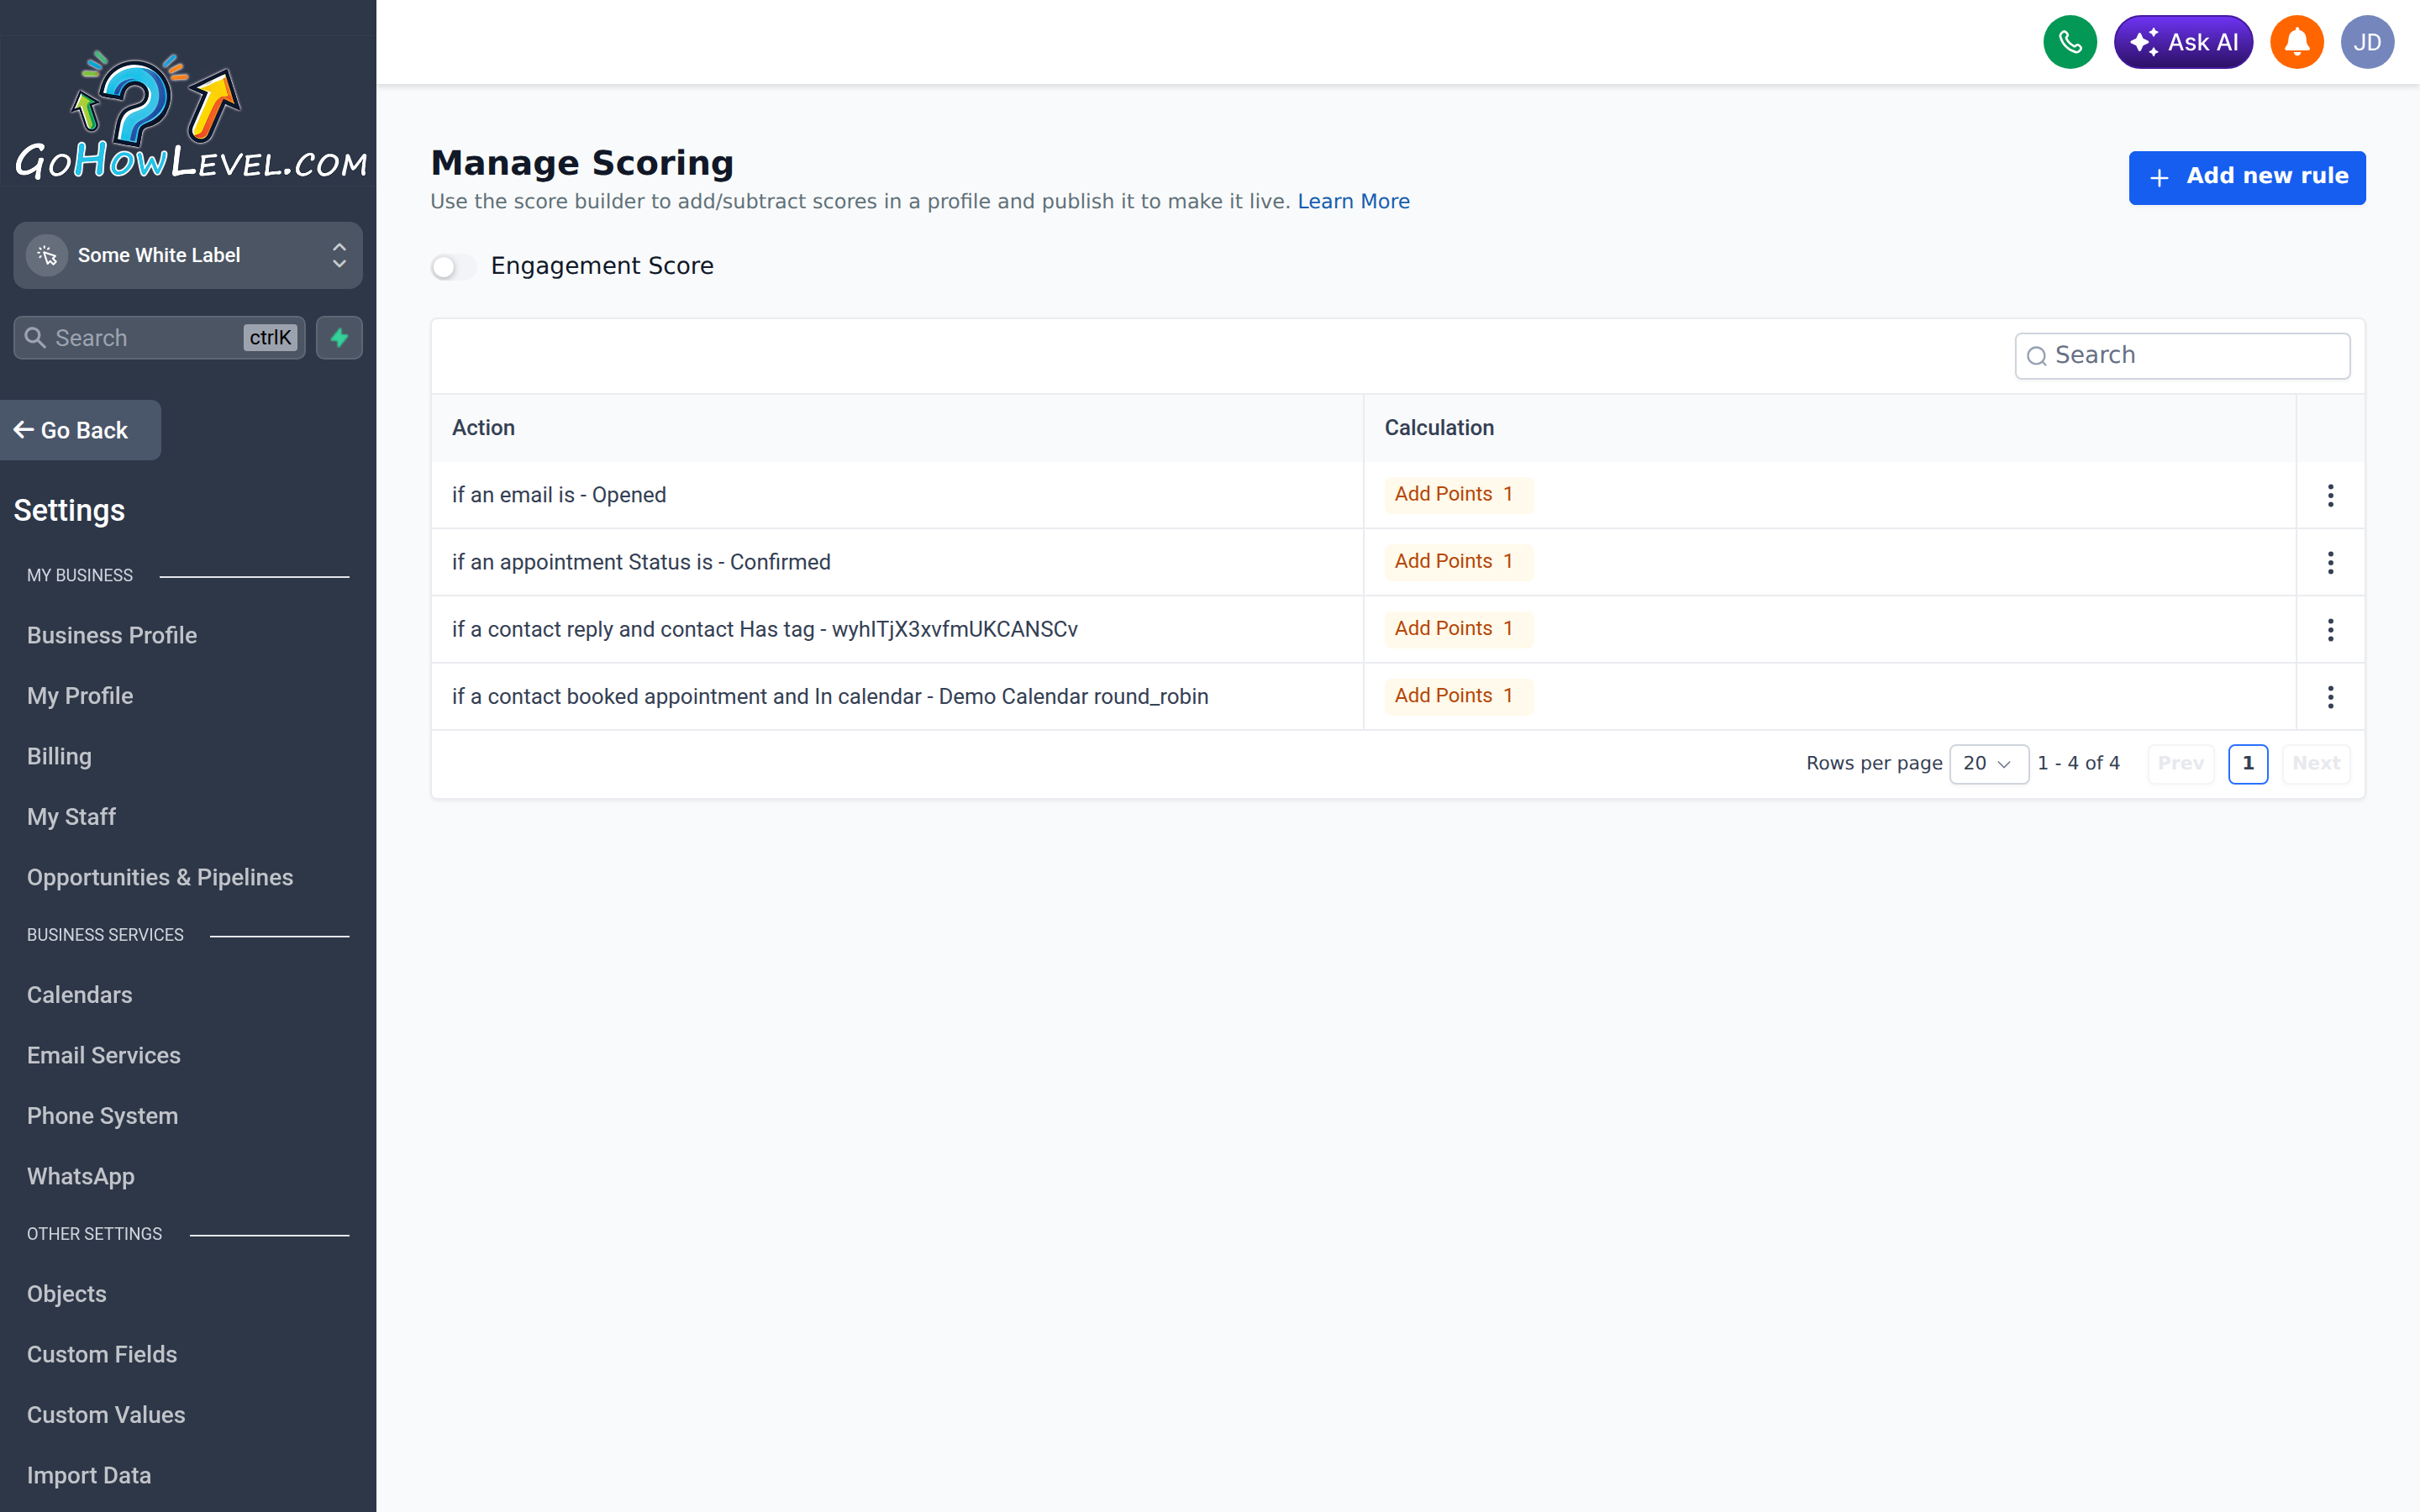
The Manage Scoring screen builds a score profile from rules that add or subtract points.
How scoring works
Section titled “How scoring works”Points are added (or subtracted) when a contact matches a trigger or condition — for example, opening an email or submitting a form. Common examples:
| Trigger | Example points |
|---|---|
| Opened an email | +5 |
| Clicked a link | +10 |
| Submitted a form | +20 |
| Booked an appointment | +30 |
| Went cold / unsubscribed | −10 |
The contact’s score is the running total of all rules they’ve matched.
Setting up scoring rules
Section titled “Setting up scoring rules”Scoring is configured on a dedicated screen. Open Settings → Lead Scoring to reach the Manage Scoring screen — “Use the score builder to add/subtract scores in a profile and publish it to make it live.” Here you build a score profile (for example, “Engagement Score”) out of rules.
- Open Settings → Lead Scoring.
- Open or create a score profile.
- Click Add new rule.
- Set the rule’s Action — the condition that triggers points. For example: if an email is Opened, if an appointment Status is Confirmed, if a contact replies and has tag X, or if a contact booked an appointment in calendar Y.
- Set the Calculation — Add Points N, where a positive number adds to the score and a negative number subtracts from it.
- Add a rule for each behavior you want to track.
- Publish the profile to make it live.
Using the score
Section titled “Using the score”Once contacts have scores, you can put them to work:
- Smart lists — filter for contacts above a score threshold to build a “hot leads” view.
- Workflows — trigger a notification, task, or follow-up when a score crosses a value.
- Prioritization — sort or display the score so reps focus on the most engaged contacts first.